I went to a friend's shower not too long ago and she was given a super cute bird mobile made of felt. I guess it's the new craze. It got me thinking that I would like to try to make one for one of my best friends who is having her first baby boy.
She likes foxes, and owls, and both her and hubs like outdoorsy type things, so I thought a forest theme would be just right.
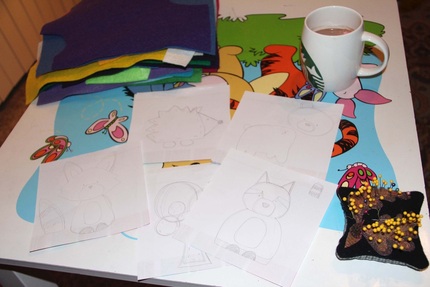
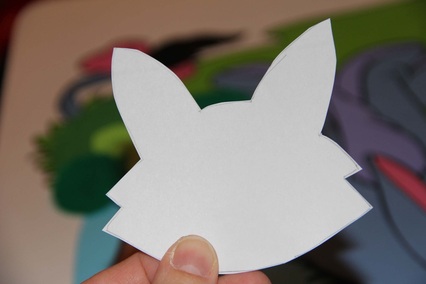
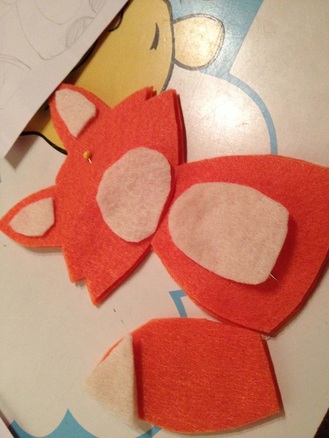
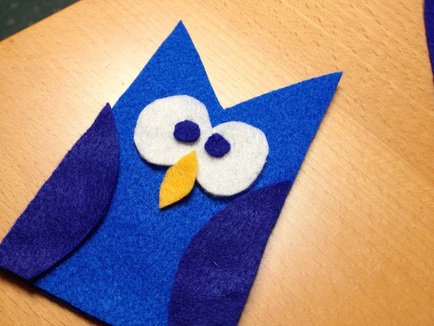
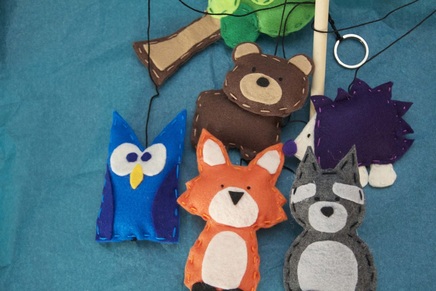
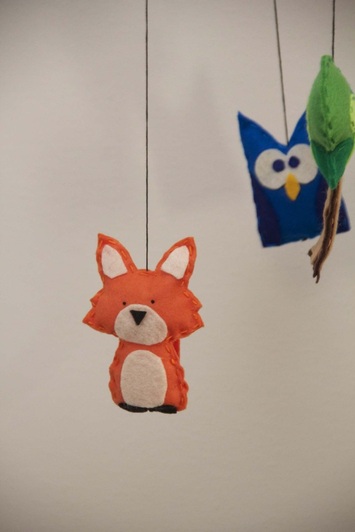
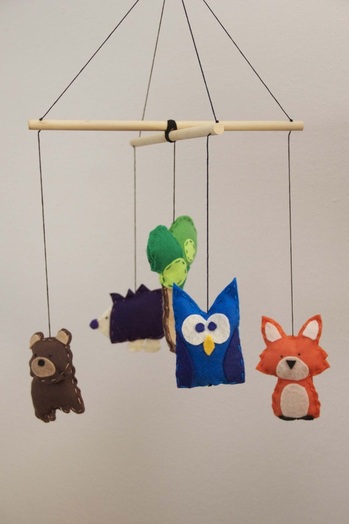
Now I've never made a mobile before, but the internet is great for looking up ideas, so that's where I started. I looked up felt foxes, felt mobiles, felt owls, whatever I wanted to have in the mobile, then I hand drew a pattern for each. Work station - pins, felt, patterns, hot chocolate! I cut out the shapes and traced it onto tracing paper and then pinned that onto the felt. I glued the top pieces (belly, ears, nose...) onto the top of the main body. I also used floss to make knots for the eyes. Then once the glue dried, I hand sewed around the critter using embroidery floss. I left a small opening to stuff with stuffing, and then sewed it shut. Cut pattern, glue, sew, stuff, sew, repeat... until you have all your desired creatures done. I used a dowel and cut it into two same length pieces and had holes drilled in the middle and one on each end. I used some more embroidery floss to tie the two together and then kept wrapping the floss around the dowels until they were tight in place. (this is hard to do so I just did what I could to make it the tightest, tried super glue but that failed) (I was a bit partial to the fox, it was sooo cute! I loved the over-sized head.)
Using some more floss, I strung the floss through the hole and down through each critter and tied a few knots so it wouldn't go right back through. If you try this, make the knot on the TOP of the dowel, not the bottom like I did, and make sure the floss is actually THROUGH the dowel before making the knot. -oh dear-
Make sure you leave plenty of floss available above the dowels to tie all four ends together and make even. I attached all four strings together with a circle key chain. I'm happy with how it turned out and hope baby enjoys it!
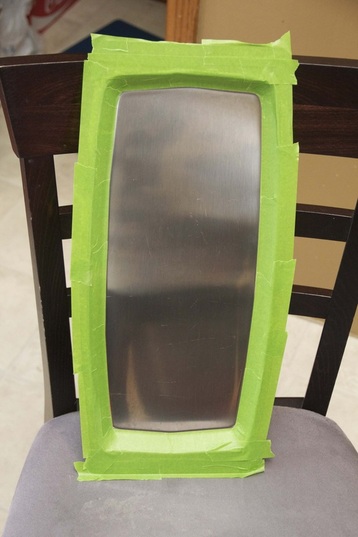
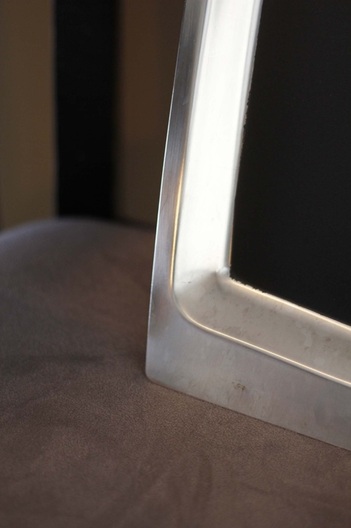
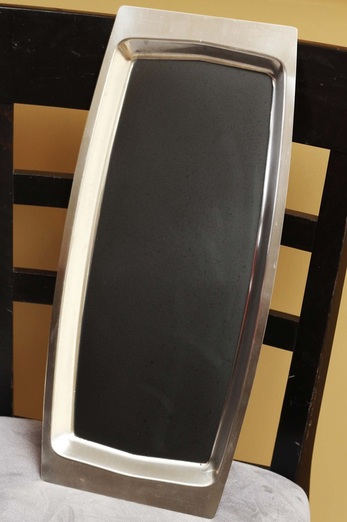
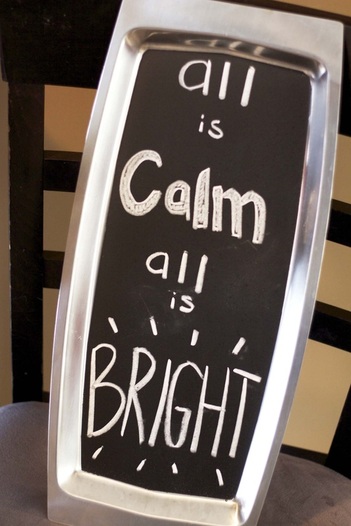
Step One: Find a cute plain platter. Step Two: Grab some Frog tape and a can of chalkboard spray paint. Step Three: Stick tape around the places you do not want the chalkboard paint. (I may have been a bit particular and may have had to peel, and re-peel multiple times, maybe) Step Four: Spray in a well-ventilated area. Spray two coats. (I sprayed in my garage and then moved it downstairs to dry since it has been well below freezing lately) Step Five: Use some chalk, write something sweet, and give it away! (I gave this one to my sister for Christmas) I do not see this being the end of my chalkboard paint fun...
Any ideas?
I'm not even sure if 'not always rainbows' is a phrase, but it's what I first thought of, so feel free to start saying it.
I just wanted to share some reality again, I know I've mentioned it before, but things are not always just the way you want, or just the way you plan in life. That goes for anyone, and I feel especially for parents with young children.
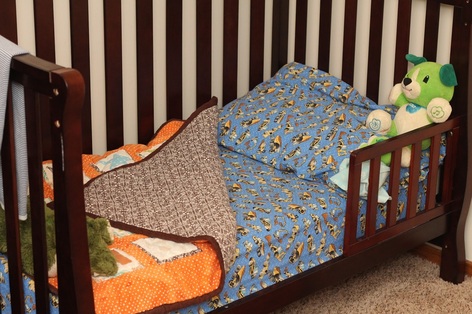
In our house for example, nap time and bed time have been a struggle with our oldest. He is 3 and sleeps in his toddler bed. Now to me, this looks very comfy, and I am sure there are days that I would just love to crawl into it and sleep, just give me a nap! But he does not feel that same way. For whatever reason, whether it's because he doesn't want to miss out on anything, or I missed the window of bed and now he is over-tired... whatever it is, it can be very trying at times. Whether he would is laying in bed singing/talking for two hours, or constantly coming out of bed for two hours, bed-time has had it's ups and downs over at this house.
Tonight, however, was amazing! I put a soft lullabye CD on in his room and he fell asleep to music playing and did not get out of bed once! A Miracle! It is so nice to have some quiet time to get things done or just get a breather! I'm hoping this works for at least a week!
But back to the crazies that sometimes happen; here are a few examples for you that have happened during our nap times. Maybe a few ideas for your little ones: 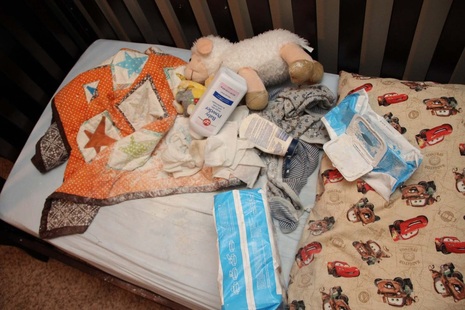 Make your own science experiment... you just need lotion, baby wipes and powder and you make a lovely paste! Much more fun than napping! 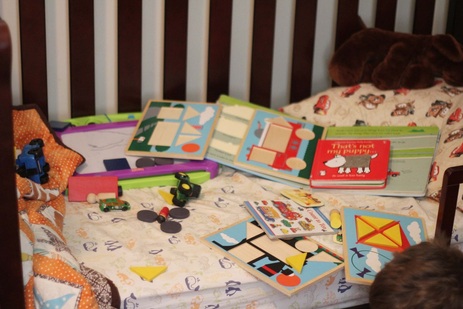 A potluck of puzzles, books and toys. A sure way to keep the mind going. I'm pretty sure that both times when this has happened, I could just see in his eyes he was soooo tired! Why do kids fight it so much?! 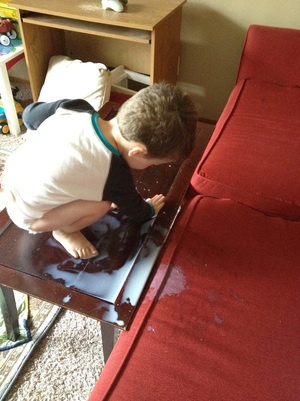 Here's another one, not nap-time - but really...? I'm sharing these to let you know you are not the only ones. But I know that all these stories will one day be fun memories that we share with our kids and look back on all too soon.
I couldn't even make these things up though! Along with all the precious, sweet memories I have of my kiddos, I have some pretty awesome/drive mom crazy moments as well!
Anyone feel like sharing theirs?!
Both of my boys have birthdays in December which makes for quite a busy month. We decided we would start having them boys share a birthday and since our oldest LOVES John Deere, and our youngest likes what his big brother likes, and since he doesn't really have a huge individual interest yet, we went with John Deere as a theme.
I enjoy making things and themes for parties, so I started looking early, and although I had hopes of being done and ready well before the party, I once again found myself getting the final touches on, the DAY of the party. But I pulled it off and who would have known really!
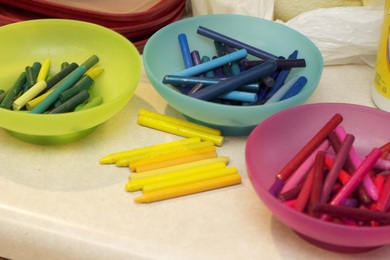
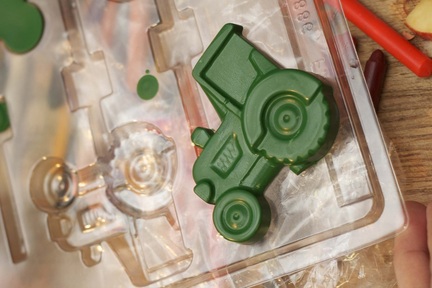
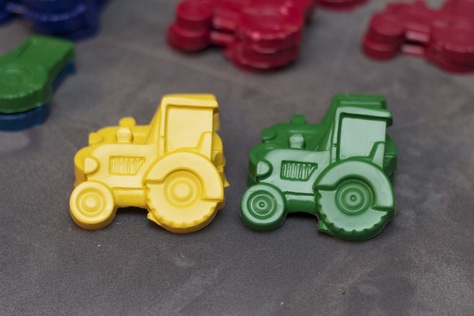
I should have taken some more photos now that I think of it, but here's what I've got. I put together a little coloring book of tractor and farm pictures and thought it would be cute to melt old crayons into tractor molds to go with.
I had been looking a while and finally found a bag at the thrift store for $1.50! It was such a sweet find!
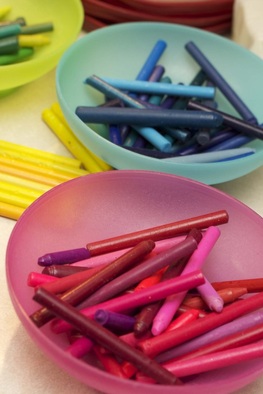
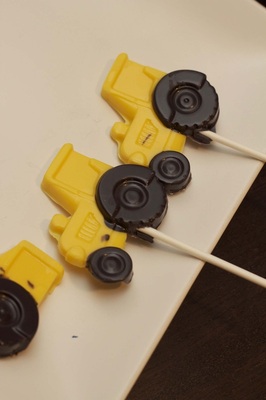
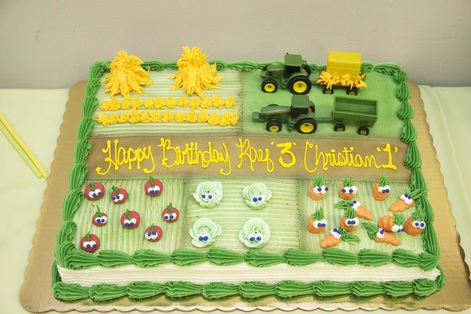
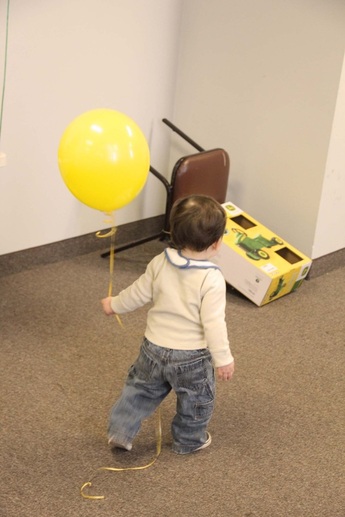
I had wanted only yellow and green but ended up with only a few sets of those and then went with blue and red which I gave to the girls of the family. Colorful bowls of colorful crayons! (see below for instructions) The final product! I also had a separate mold I used for suckers made from vanilla flavored chocolate. I thought it may be confusing, but I hadn't heard any problems so that's good! I also decided against making my own cake this year, eliminating any more stress or time it may involve and thought this cake turned out pretty darn cute! And. It was soooo delicious. Right from a local bakery, chocolate cake with a fudge layer in the middle, and cute veggies with eyes! And of course the tractors were a hit with my oldest. I had found some John Deere brand balloons on ebay and those were quite a hit with the cousins. I tied them to some toy tractors of ours and used them as centerpieces, however they did not stay on the table long. They became a take home party favor as well.
Over-all I'd say it was a pretty fun party. One of the best parts was that it wasn't at our house so less clean-up! We rented a room at the local bowling alley and they took care of the pizza and clean-up for us! There's my littlest deere! Crayon Molds Boil a pot of water on the stove and grab an empty tin can with the wrapper off. Once the water is boiling add the crayons to the tin can and stir until it is all liquid. Pour into your mold and stick it in the freezer for about 10 minutes. Once the crayons are completely cooled they will pop right out
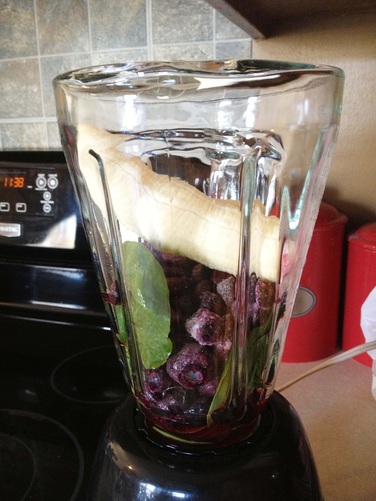
You should probably make this today... I had bought some fresh spinach last week to add to some rotini noodles and delicious garlic spinach sauce, and it was pretty great. So with a big bag of spinach sitting in the fridge, and after my family going through it's second-shorter round of the flu this season, I thought this would feel good to drink. I found the recipe on Pinterest, weird right? (credit- _YummyMummyKitchen) When it said immune boosting that just sounded even better. I really hate the flu. So I varied every so slightly from the recipe from the site and here it is:
Spinach-Berry-Smoothie 1/2 cup fruit juice (I used what I had on hand-Blueberry Pomegrante or
something like that)
1 cup fresh spinach
1 1/2 cup frozen blueberries
1 1/2 banana
I feel like smoothies always have to contain yogurt, and this one doesn't. I almost added it but didn't! I'm so crazy right?! It was real good and I do recommend making it!
My fam and I are all on the mend now I hope and can't wait until this flu season ends!
Since having kids I have really kicked-it-up-a-knotch in the coffee drinking department.
However, I can't have just black coffee, I need sugar, and I need creamer! It can't taste like straight up coffee!
Don't get me wrong, the creamers from the store, delicious!
However, I thought I would try making my own, the idea being that it would be "healthier" :) As healthy as creamer can get I suppose.
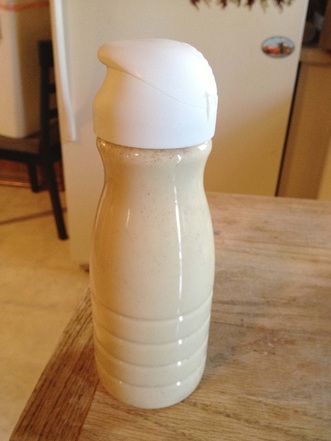
My first try at it wasn't too bad. I saved a store bought creamer container and cleaned it out real good, peeled the label off, and here it is! Vanilla-Cinnamon Creamer 1 14oz can sweetened condensed milk
1 1 1/2 cup whole milk
1 Tablespoon vanilla
1/2 Teaspoon cinnamon Next time I will not be adding the cinnamon, I could definitely taste it and it is not my favorite. I also want to make it SWEETER! But for my first time I would say it was pretty good! This creamer can stay in your fridge for about two weeks. Go give it a shot!
|

 RSS Feed